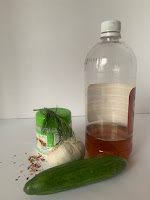
Cool as a cucumber when you're in a pickle
As an Amazon Associate I earn if you purchase from a quailfying link in my posts.
Certainly in this time of quarantine, you're not going to just run out to the store to buy a jar. Besides, as we all know, homemade is always better.
And, in the case of these dill pickles, they are super-easy to make.
I had a half dozen mini cukes left over from a recent recipe and everything else was already in my pantry, so when Hubby said a dill pickle might be nice for a snack, I was able to throw a jar together for a snack that would be ready in a few hours.
I have most of these things on hand because I like to pickle all sorts of things -- from okra and green beans to carrots and asparagus. Any ripe, firm-skinned vegetable would make a tasty, crisp snack. (Also, if you drink Bloody Marys at brunch, you can add a few extra vitamins to your indulgence with a pickled veggie treat in place of a tired old piece of celery.)
Because these pickles will be eaten before the end of the weekend, I used fresh dill from the garden and just closed up the jar and threw it into the fridge. If we were canning the pickles to eat throughout the summer, we would use dill seeds and used standard heat canning process. I'll give you instructions for both.
Dill Pickles
Makes 1 quart jar of pickles (or two pint jars)
- 5 mini cucumbers (or 2-3 Kirby cucumbers, quartered lengthwise)
- 4 cloves of garlic, peeled and smashed
- 2 teaspoons dill seeds (or an equivalent amount of leaves)
- 1/2 teaspoon of red pepper flakes
- 1 1/4 cups of apple cider vinegar
- 1 1/4 cups of water
- 1 1/2 tablespoons of pickling salt or kosher salt
 |
- If you are canning the pickles for long term storage, you will need to sterilize the jar in a large pot of boiling water. If you are planning to make refrigerator pickles, you just need to wash the jar and the lid.
- Wash and dry the cucumbers and trim off the stem end (the stem end contains enzymes that will break down the pickle and make it limp...and no one wants a limp pickle!)
- You can leave the pickles whole, as I did, or cut them into quarters lengthwise, or sandwich slices or cut them into coins.
- Pack the cucumbers and the spices into the jar.
- Put the vinegar, the water and the salt into a small pot and bring it to a rolling boil.
- Pour the brine over the pickles, so that the jar is filled to half an inch below the top. Don't worry if you don't use it all.
- Tap the jar on the counter to dislodge any air bubbles and add brine if necessary.
- Screw the lid on as tightly as you can.
- Let the jar cool and store in your refrigerator.
NOTE: If you are processing the pickles for long term storage, bring a pot of water to a boil, put the jar in the pot and after the water comes back to a boil, set a timer for five minutes. At the end of that time, take the jar out immediately. Pack the jars as above. Meanwhile, bring another pot of water to a boil and place the jars in that pot and bring to a boil again and remove after 5 minutes. Put the jars on the counter to cool. When the lid pops (you'll know the sound when you hear it), it's ready to go...you can store the pickles on the shelf indefinitely. If you don't hear a pop, store the pickles in the fridge and eat them within a few weeks. For more information on canning safety, check out the USDA's guide.


